Introduction
From Mimer SQL version 9.2.4, the DbVisualizer™ SQL tool has been bundled with the Mimer SQL distribution. DbVisualizer is a powerful, cross-platform database tool built on Java, using JDBC (Java Database Connectivity) to connect to databases.
This article will show how easy it is to connect to Mimer SQL from DbVisualizer, here exemplified on macOS.
The connection is made using JDBC, and DbVisualizer comes with a builtin JDBC driver for Mimer SQL.
Description
Install Mimer SQL
First, install Mimer SQL for macOS. The installation package can be fetched from the Mimer SQL download page.
Mimer SQL for macOS contains two parts:
- Command line based components
All the Mimer SQL software components can be used and accessed from the Terminal application, or analogous. The provided libraries, programs, scripts, etc. are installed in /opt/mimersql1108-11.0.8F, or corresponding. These components are then linked to system wide locations, such as /usr/local/bin and /usr/local/lib, usually reachable using PATH setup and such environment variables.
This part is principally comparable to the Mimer SQL installation on Linux and other Linux based platforms. - GUI based components
Some of the functionality are available as a set of applications that can be run from the Finder, located as Applications/MimerSQL-11.0.8F, or corresponding.
The user applications that comes with the Mimer SQL distribution, suitably launched from the Finder, are the following:
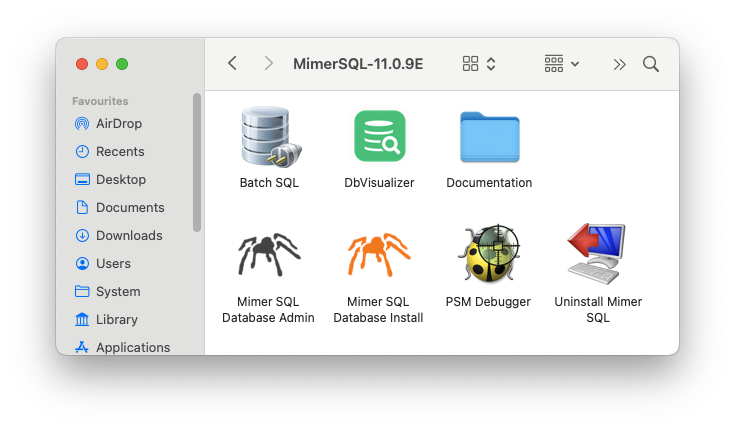
- Batch SQL, for command line access to a database server
- DbVisualizer, for a graphical access to a database sever
- A folder with documentation
- Mimer SQL Database Admin, a graphical interface used to control Mimer SQL databases, for example to start and stop a database server
- Mimer SQL Database Install, a graphical interface used to create new Mimer SQL databases on the installed server
- PSM debugger, a tool to debug PSM database procedures
- Uninstall Mimer SQL
Create a Mimer SQL database
To create a database, use Finder to start the Mimer SQL Database Install application found in the main directory of the Mimer SQL installation, like /Applications/MimerSQL-11.0.8F. Or, use the dbinstall command from a Terminal window.
The first thing to do when this application is started is to choose name for your database and a password for the Mimer SQL database ident (user) called SYSADM. The SYSADM ident is the database user that is commonly referred to as the System Administrator for the database. In the example below we are using the database name mimerdb.
Below is the Mimer SQL Database Install screen. If you in addition to the database also want a sample database model with some data to experiment with in DbVisualizer, check the box for “Populate the database with an example environment” found under Database Options; all other options can be safely left with their default values. Click the Install button once done to start the installation.

The installation takes a moment to perform and signals completion with a confirmation dialogue.
Now the Mimer SQL database named mimerdb is created. It is up and running, ready to use, and can be managed using the application called Mimer SQL Database Admin, as mentioned above.
DbVisualizer access
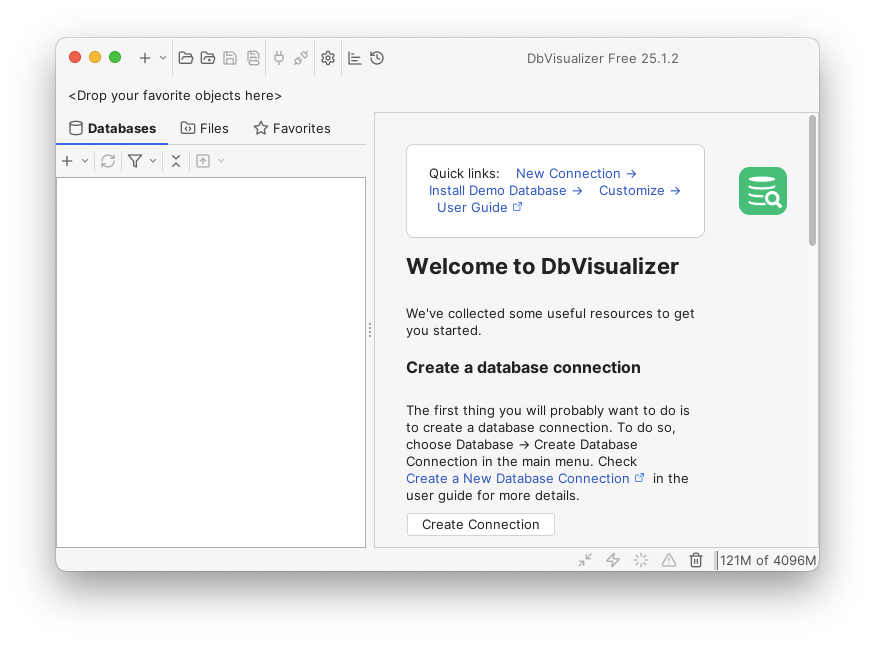
When the database is created, it is time to setup the connection between Mimer SQL and the DbVisualizer tool. From Finder, start the DbVisualizer application which will open up the following welcome screen:
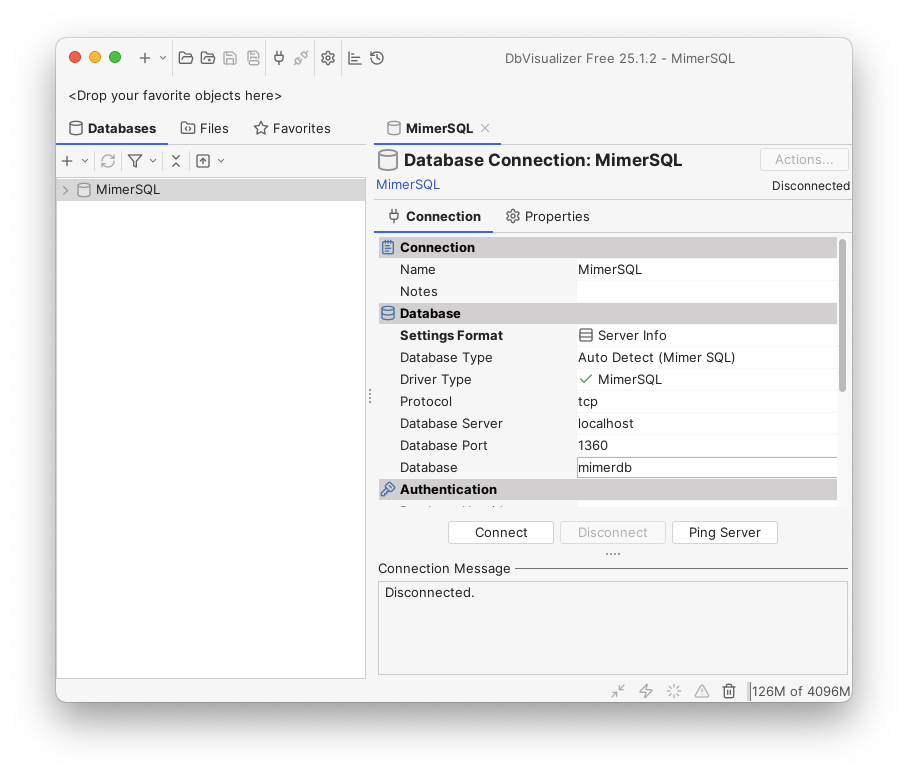
Click the Create Connection button to do the database access setup. To the left, a list of all database drivers available in DbVisualizer will be provided. Scroll down and select the “Mimer SQL” driver:

Double-click on the “Mimer SQL” entry in the list of drivers to the left. Most of the fields can be left as is, using the default values, but a few have to be filled in:
- Database. Here the name that was given to database should be entered. In our case that is “mimerdb”.
- Database Userid. Here a database ident (user). The one we use in our example is “SYSADM”, but if the sample database content was loaded the ident named MIMER_STORE should be available.
- Database Password. Enter the password of the used database ident. For SYSADM this will be the password entered when creating the database. For MIMER_STORE the password is “GoodiesRUs”.
To do a verification of the values given, click the Ping Server button:
If the ping operation is successful, the following message box should be displayed:

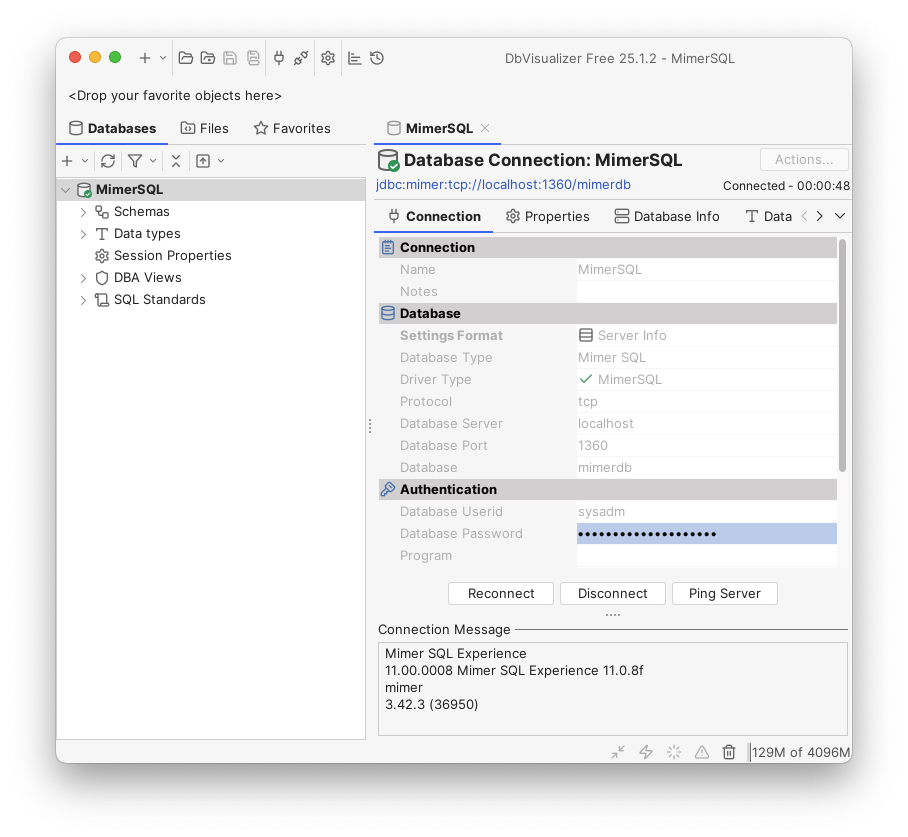
We are now fully prepared to try to connect to the Mimer SQL database. Click the Connect button and the following screen will appear with the Mimer SQL contents to the left and the connection information in the bottom showing involved component versions:
So, time to do our first database query towards the Mimer SQL database server. From the drop down list in the top pane, select New SQL Commander as follows:

A commander window opens up where SQL statements can be entered. In our case we do a SELECT statement to see all created tables;
SELECT * FROM INFORMATION_SCHEMA.TABLES;
To execute the focused command, the green triangle just above the commander window is clicked. The result of the query will be displayed below the window:

The result of the query is shown, listings the database tables currently available.
Summary
This article is based on a Mimer SQL installation made on macOS, showing the simplicity in installing Mimer SQL and setting up the connection from DbVisualizer to the database server. The procedure used here is very similar to the one that can be used for a Mimer SQL installation procedure on Linux. A corresponding procedure are of course available for Mimer SQL on Windows as well!
Links
All the details of Mimer SQL can be found in the Mimer SQL Documentation Set, and for the macOS specifics see the Mimer SQL Getting Started on macOS.
For further details on Mimer SQL and JDBC please see the article about JDBC as database API »
Also, see the Mimer JDBC Driver Guide »
More information on the DbVisualizer tool can be found here »